I’m interested in generating a smoothed and closed surface representation of the female pelvis (body) using an MRI DICOM image. It doesn’t need to be exact, just smooth enough for presentation purposes. Here are the general steps I’ve taken so far:
I used SimpleITK (SITK) to iterate through the image to find the first non-zero voxel.
I saved the resulting segmentation image as an Nifti file.
I opened the Nifti file in MITK and used the “create polygon model” function, saving the model as a .VTK file.
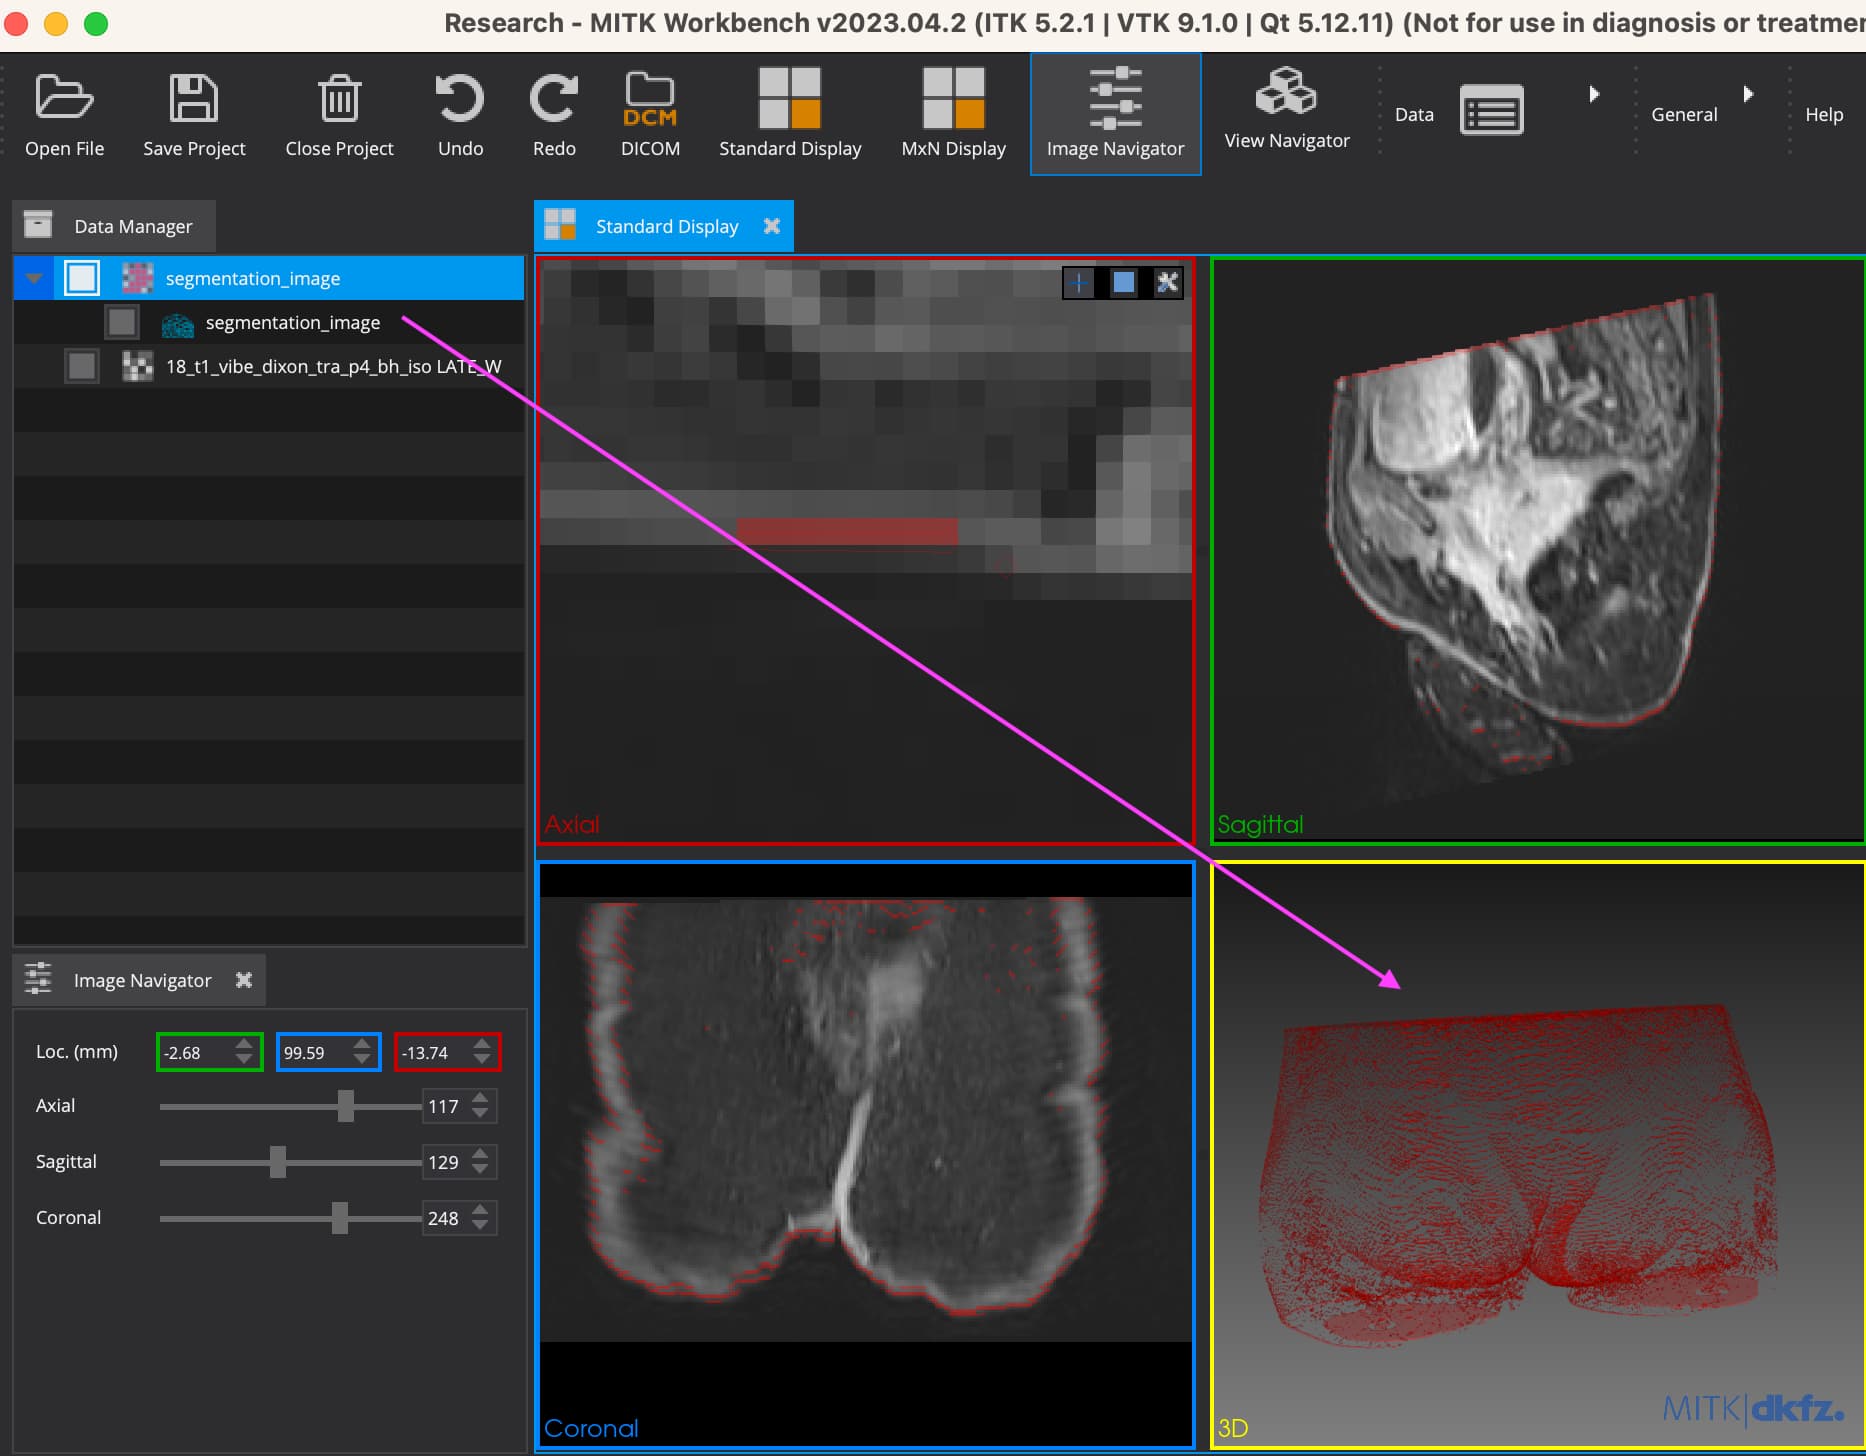
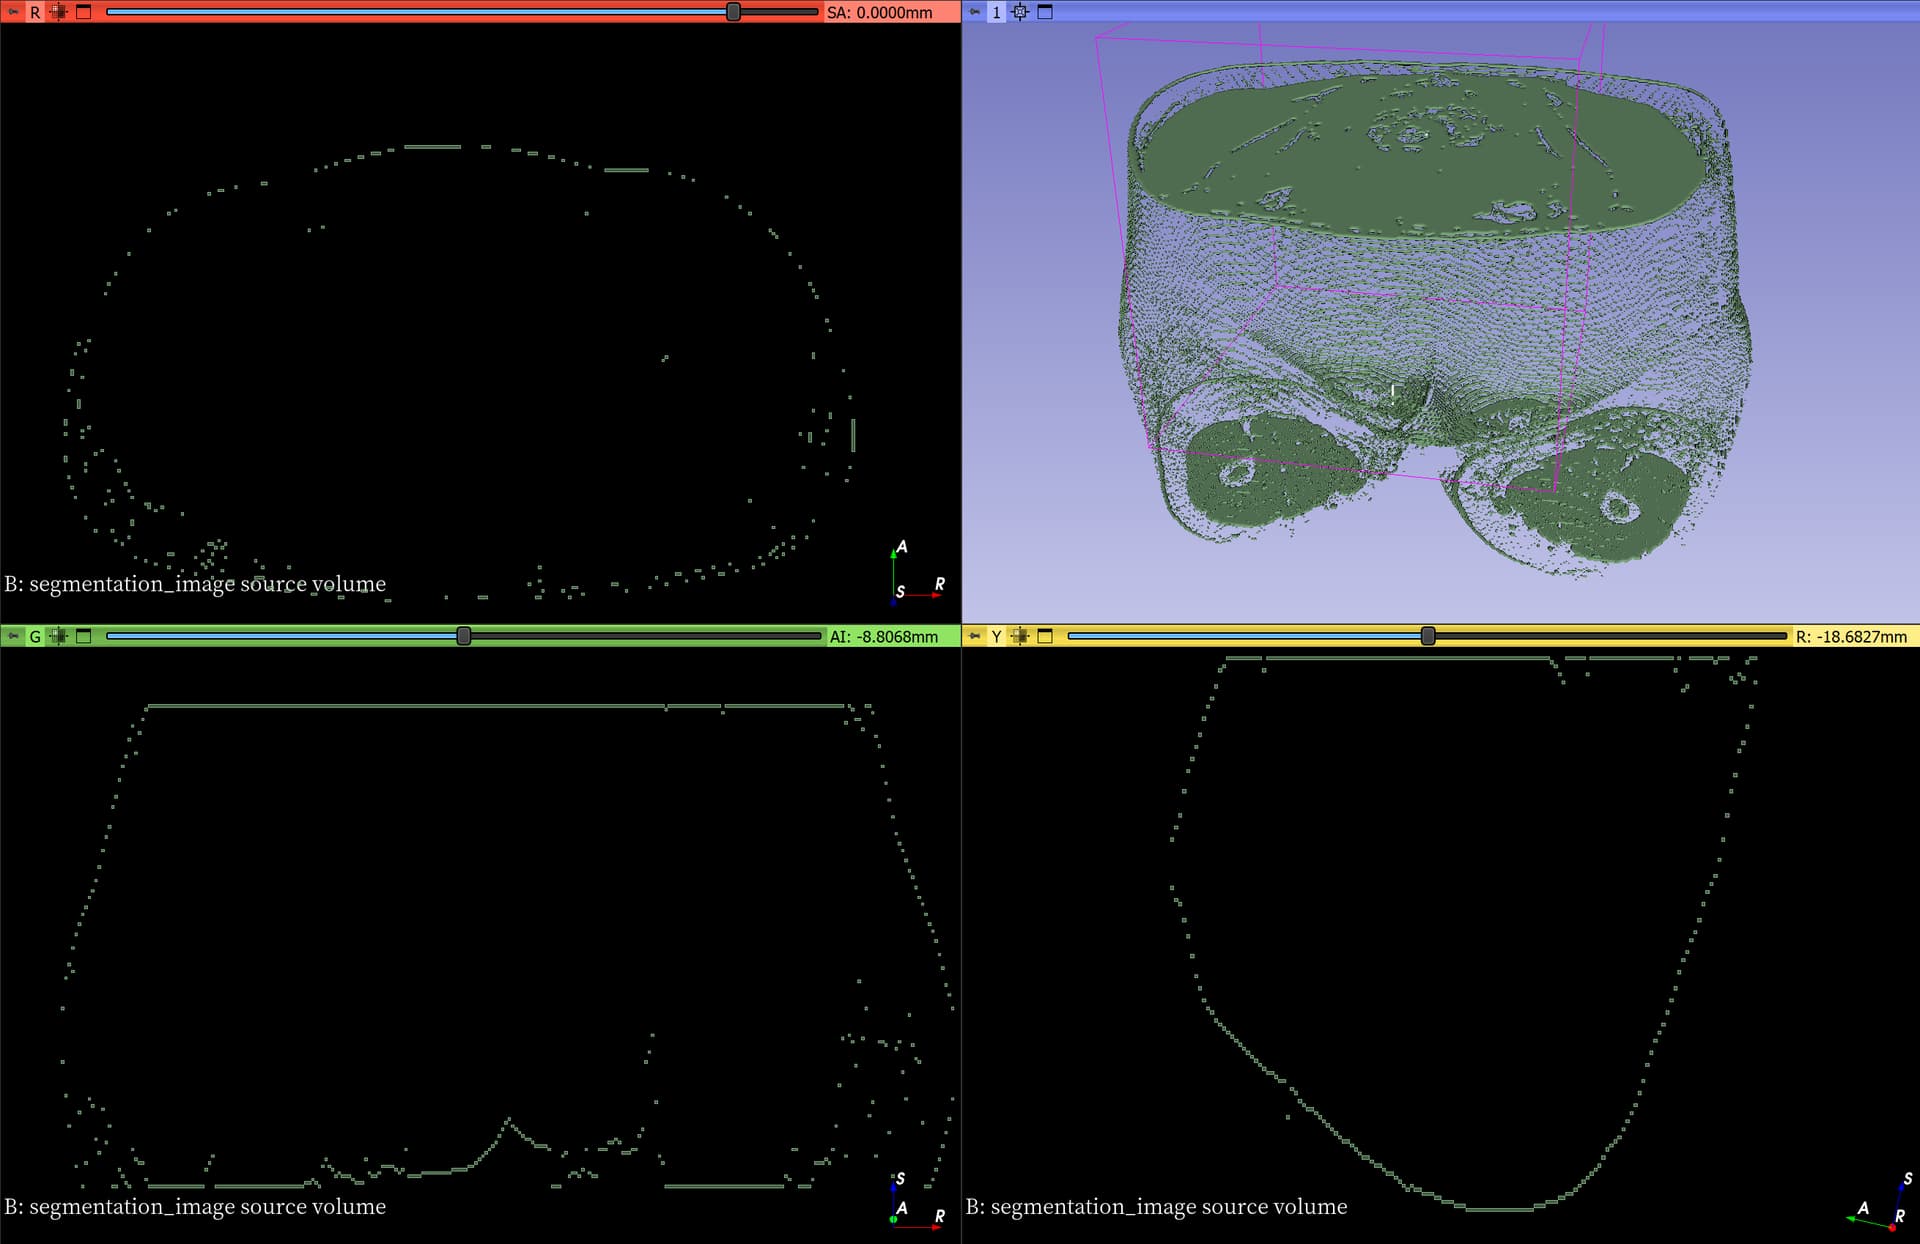
However, I’m now looking for ways to further improve this output surface. Specifically, I want to achieve a smoothed and closed surface without any holes. I’ve attempted to use various filters in ParaView, such as Delaunay3D, Decimate, Smooth, Curvature, but so far, I haven’t had much success. This is the mesh I want to close:
Interestingly, I did manage to create a beautiful surface using this algorithm for the head (scalp or skull segmentation), represented in red in the attached image.
If anyone has suggestions or recommendations on how to achieve a smoother and closed surface representation from the output I have, I would greatly appreciate your input.
You can get a smooth model of the skin surface fully automatically using 3D Slicer by following this recipe. If you have any questions about how to adjust smoothing or improve reconstructed surface quality then you can ask on the Slicer Forum.
Hi Andreas. Thanks for the quick reply. However, my goal is to replicate my previous work with a surface quality comparable to the smoothed scalp surface, as shown in the attached image. This surface should be easily modifiable using surface editing software such as ParaView. I’m seeking a filter capable of generating a closed surface from my NIfTI image as input. The issue with my NIfTI image, as depicted in the image, is the presence of holes that lead to a low-quality mesh in the output.
I’m not sure what is the challenging part of your workflow. If you have already segmented the image manually and saved the result as a NIFTI file (labelmap image) then you can use flying edges filter followed by sinc polydata smoothing filter to generate a smooth closed surface. If you have multiple labels and you want them to be smoothed simultaneously while keeping their interfaces watertight is slightly more complicated, but doable using VTK filters, too. There is also a very new surface net filter that can extract very high resolution meshes very quickly (but you may still need to apply additional smoothing similarly to flying edges output).
I appreciate your responses. Following your recommendations, I attempted the following steps: firstly, I executed the provided code, and secondly, I utilized the Slicer GUI, although the results were not entirely satisfactory. In response to your query, my primary objective is to visualize the body surface for localization purposes. For instance, I need to determine the side of the body where the tumor is located. As a result, I mentioned earlier that the surface precision is not crucial. I have attached the NIFTI image, and perhaps you can achieve better results than I have.segmentation_image.nii.zip (77.8 KB)
import vtkmodules.all as vtk
# Step 1: Load the NIFTI labelmap image
reader = vtk.vtkNIFTIImageReader()
reader.SetFileName("my_labelmap.nii")
reader.Update()

# Step 2: Create a vtkFlyingEdges3D object
flying_edges = vtk.vtkFlyingEdges3D()
flying_edges.SetInputConnection(reader.GetOutputPort())

# Step 3: Create a vtkWindowedSincPolyDataFilter for smoothing
smoothing_filter = vtk.vtkWindowedSincPolyDataFilter()
smoothing_filter.SetInputConnection(flying_edges.GetOutputPort())
smoothing_filter.SetNumberOfIterations(30)  # Adjust the number of iterations as needed
smoothing_filter.NormalizeCoordinatesOn()
smoothing_filter.Update()

# Step 4: Save the resulting smooth closed surface to a mesh file (e.g., STL)
writer = vtk.vtkSTLWriter()
writer.SetFileName("output_mesh.stl")  # Replace with your desired output file path
writer.SetInputConnection(smoothing_filter.GetOutputPort())
writer.Write()

print("Smooth closed surface mesh saved as output_mesh.stl")
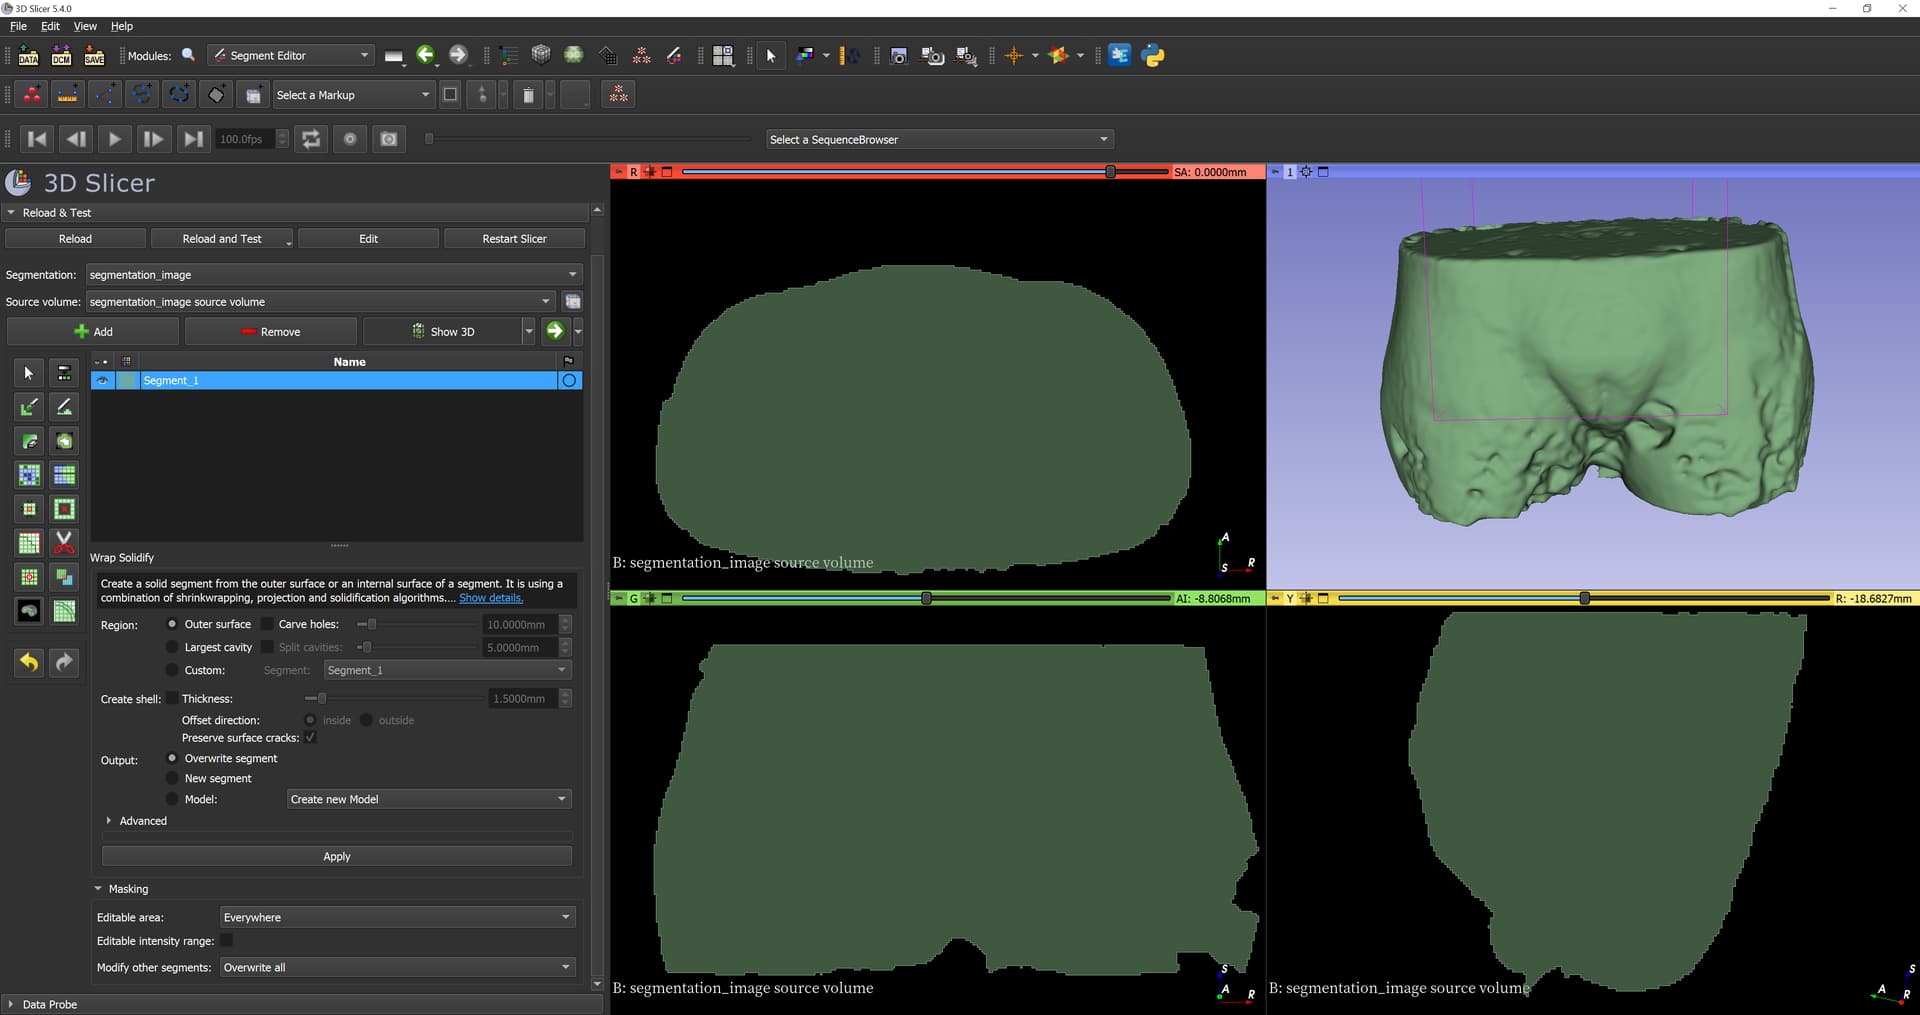
For a 3D reconstruction you need solid filled slices, not just draw a perimeter. You can use Slicer’s “Wrap solidify” tool in Segment Editor to reconstruct a closed surface from these random surface points:
However, a better solution is to create a proper segmentation in the first place. You can use the recipe that I linked above to extract the skin surface and create a closed surface fully automatically. If you need to run the processing without a GUI then you can write a short Python script that executes the steps without any user interaction.
BTW, I’ve gone through your Surface Wrap Solidify module page and I’m curious about the approach you employed to create the movie of the rotating mesh synchronized with the axial view’s movement, as demonstrated on this page, following this sentence: “Example processing result”. Was this achieved using a GUI-based model? Also, could you please share the specific dataset you used for this? It doesn’t appear to be available in the Sample Data module in Slicer.
You can create a movie of slicing through an image and segmentation using the Screen Capture module. Select a slice view as main view, slice sweep mode. For rotating mesh you can choose a 3D view as main view and 3D rotation mode. To both rotate 3D and slice sweep you can try enabling automatic rotation in the 3D view controller and record a slice sweep movie.
MRBrainTumor1 data set is used in the segmentation recipe.
I see now that you are interested in the hip fracture data set showcased in SurfaceWrapSolidify extension’s documentation. The 3D image of that is not published but you can ask Sebastien Andress, the developer of the extension, if he has some data set that he can share with you.